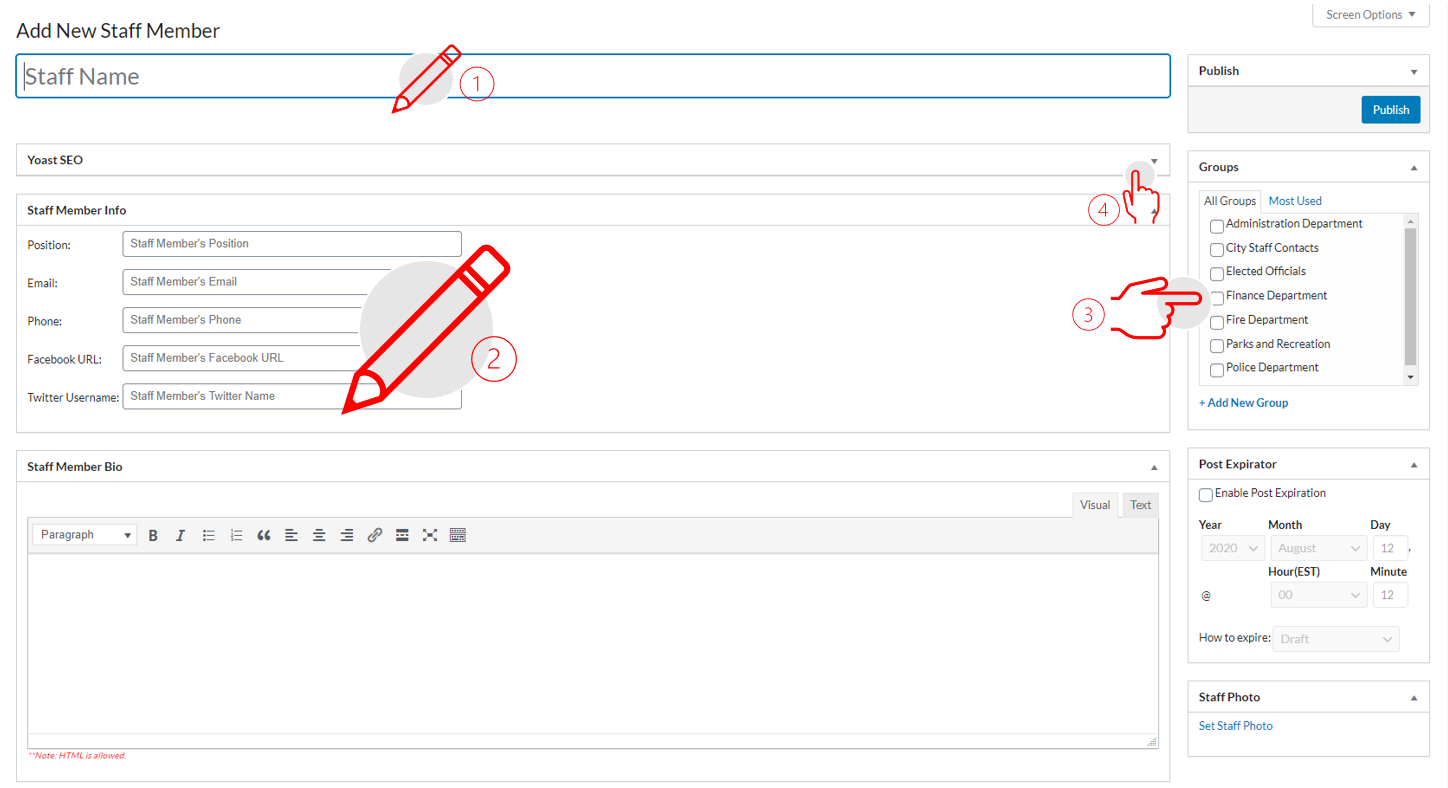
By creating a new contact that has staff member name, position, label, and form of communication either email or/and phone. We use labels to distribute where the contacts display throughout the site.
- Got to the dashboard
- Click on the ‘Contacts’ icon or the ‘Contacts’ label on the left navigation bar
- Click on ‘Add New’
- Add new staff member
- Type in staff name
- In the ‘Staff Member Info’
- Position
- Phone
- Optional fields – Facebook URL, Twitter Username
- Try to be consistent with the information you fill in for each staff member.
- Add staff member bio in the visual editor, this is optional
- Add Staff photo, the photo will display similar to the feature image style
- Headshot photos should be portrait orientation.
- The tool is going to crop and resize images for responsive design, so before uploading the headshots, crop out areas with lots of space around the face area such as background or even chest and torso.
- Pick from the media library
- Click ‘Set Staff Photo’
- Pick Group(s)
- The staff member can belong to multiple groups, select all that apply. For example, if someone should be displayed in ‘City Staff’ AND ‘Administration Staff’ you should select both groups. This would also be the case if someone should be displayed in the elected ‘Elected Official’ or ‘Council’ group.
