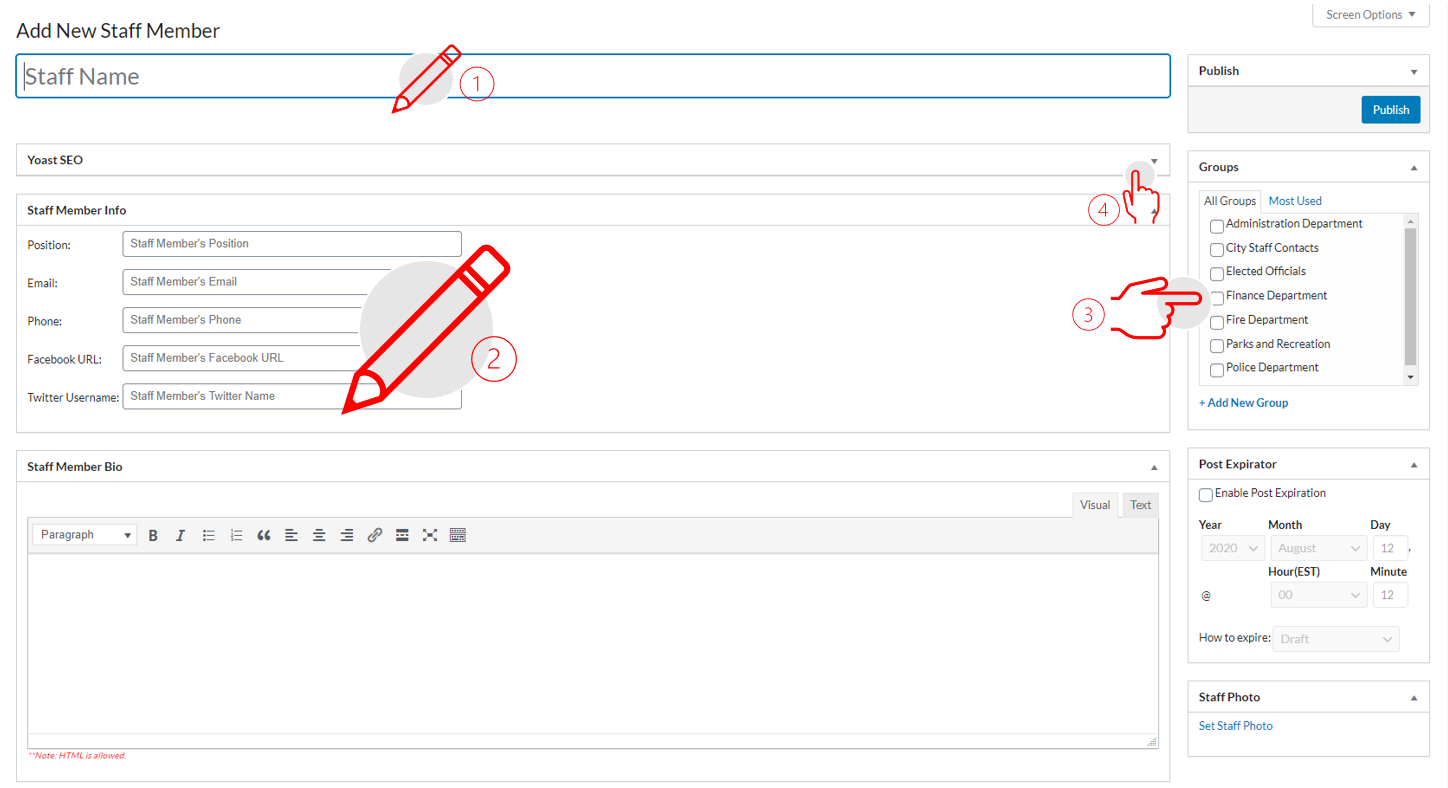
First, you would have had to create contact groups and new contacts. If you do not recall these steps, follow the ‘How to create contacts in your ProudCity powered government website‘ guide.
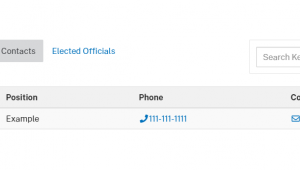
The contact list widget will display a list of staff members based on the selected group on an existing page.
- Navigate to an existing page
- Note: You should know you are on a page when the admin bar on top states ‘Edit page’
- Click ‘Edit page’
- Enable page builder by clicking on the ‘Pagebuilder’ tab, if there is no option to click on the tab, the page builder layout is enabled.
- Note: In order to use the contacts list widget, the page builder has to be enabled

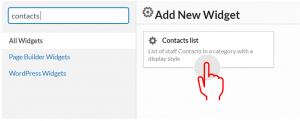
- Click on the ‘Add widget’ icon tab
- Add page title by selecting the ‘Page title’ widget
- Note: You can scroll through the widgets or type in the widget name on the search bar.
- Click on the ‘Add widget’ icon tab
- Add the ‘Contact list’ widget
- Hover over the ‘Contact list’ widget and click edit
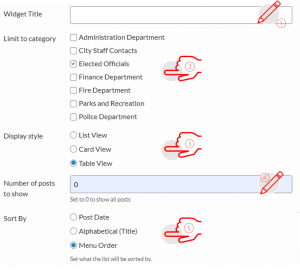
- Add widget title
- Pick the category(ies) to display
- Select display style
- Contact lists are commonly displayed in the ‘Table View’ style but you can always go back and change the style that best matches your ProudCity site.
- Insert a number of posts to show in the ‘Number of post to show’ field
- Enter 0 for ‘Number of posts to show’ in order for all staff members that are attributed to the selected category to display.
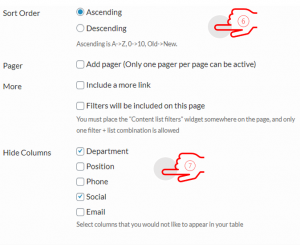
- Select ‘Sort By’ option
- Select ‘Hide Columns’ option
- If your contact list widget is being used on a department page, it is recommended to hide ‘Department’ and ‘Social’. This eliminates redundant information and allows for a cleaner look.
- Hide certain columns if they do not pertain to the list you’re creating.
- Click done
- Click ‘Update’
- Click ‘View Page’ on the top admin bar or the permalink to view page
- Note: To go back into the page admin functionality click on ‘Edit Page’ on the top admin bar.