Events and calendars

Information for all things ProudCity events and calendars.

Videos

Answers

  1. Events page elements (front-end)
    1. https://example.proudcity.com/events/ 
    2. Can filter by categories
    3. Event details
      1. Date
      2. Location
      3. Directions
      4. Download to calendar
      5. Share
      6. Upcoming events
  2. Create event categories
    1. Dashboard
    2. Events
    3. Events category
    4. Add new
      1. No parent
      2. Parent
  3. Add event
    1. Title
    2. Content
    3. Where (location)
    4. When
    5. Category
    6. Publish
  1. Go to the dashboard
  2. Click on the ‘Events’ on the left navigation bar
  3. Click on ‘Recurring Events’
  4. Click ‘Add Recurring Event’
  5. Select category, on the right side, in the ‘Event Categories’ section
    • The event post can belong to many categories, click all that apply
  6. Add content using the visual editor
    • The visual editor is your standard WYSIWYG editor and the simplest editor for just adding content to a page.
    • A quick detailed guide on how to structure content
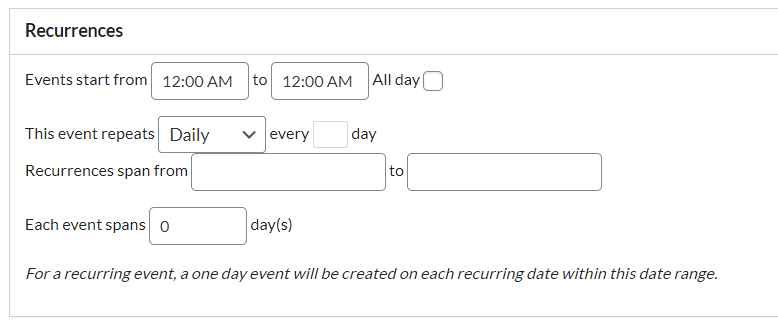
  7. Add the recurrences on the ‘Recurrences’ section under the visual editor.
    • recurrences screen shot
  8. Add the event location in the ‘Where’ section, under the ‘Recurrences’ tab.
    • If the event does not have a physical location,  checkmark ‘This event  does not have a physical location’
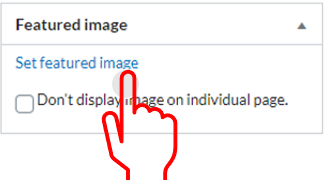
  9. Add a featured image that will display under the event title and as a thumbnail preview when published
    • Click on the set featured image link on the “Featured image” section located by the bottom right side
    • Select either upload files or media library
    • Select image
    • Add alt text and click on the ‘Set featured image’ button
    • Click ‘Publish’
    • An option to hide the image from the page will  generate after clicking publish
    • If you wish to hide the image within the post, checkmark the option “Don’t display image on individual page” afterward click publish to update changes.
    • featured image click
  10. You created a recurring event! If a change needs to be made that applies to all event within the thread of recurring events, you can make the update by
    • Clicking on the ‘Recurring Events’ option on the left navigation bar
    • Selecting the event that needs to be modified and updating
      • If there are modifications to event dates all recurrences of this event will be deleted and recreated, previous bookings will be deleted.
    • If it is only one event that needs to update,
      • Click on ‘Events’
      • Select the individual recurring event and make the update
  1. From the dashboard select events
  2. View list of recurring events
  3. Editing recurring event
    1. Edit from recurring event list to change the entire string of events
    2. Make update
    3. Publish
  4. Editing a specific event within a string of a recurring event
    1. Dashboard
    2. Events
    3. Find the specific event that you want to edit
    4. Select edit
    5. Update
  1. Go to the dashboard
  2. Click on the ‘Events’ label on the left navigation bar
  3. Click on ‘Event Categories’ on the left navigation bar,
  4. Add new event category
    • Write a name for the event category
    • Leave the ‘Parent Category’ dropdown with the default text of ‘None’.
    • Click ‘Add New Event  Category’
    • event category screen shot
  1. Navigate to an existing page
    • Note: You should know you are on a page when the admin bar on top states ‘Edit page’
  2. Click ‘Edit page’
  3. Enable page builder by clicking on the ‘Pagebuilder’ tab, if there is no option to click on the tab, the page builder layout is enabled.
    • Note: In order to use the events list widget, the page builder has to be enabled
    • click page builder
  4. Click on the ‘Add widget’ icon tab
  5. Add page title by selecting the ‘Page title’ widget
    • Note: You can scroll through the widgets or type in the widget name on the search bar.
  6. Click on the ‘Add widget’ icon tab
  7. Add the ‘Events List’ widget
    • event list screen shot
  8. Hover over the ‘Events Post list’  widget and click edit
    • Add widget title
    • Pick the category(ies) to display
    • Select display style
      • events posts are commonly displayed in the ‘List View’ style but you can always go back and change the style that best matches your ProudCity site.
    • Insert a number of posts to show in the ‘Number of post to show’ field
      • Enter 0 for all events posts to show under the selected category type or select a specific amount to list.
    • Check or unchecked
      • Featured
      • Pager
      • More
    • Click done
    • steps for events screen shot
  9. Click ‘Update’
  10.  Click ‘View Page’ on the top admin bar or  the permalink to view page
    •  Note: To go back into the page admin functionality click on ‘Edit Page’ on the top admin bar.
  11. Finished, your events will now be listed on the page!
Close window