Overview
A document will have a title, category label, download button and embedded file.This guide is divided into 3 sections that will help you fully understand how to add document type, create documents and use the document list widget to publish documents across your site.
Video
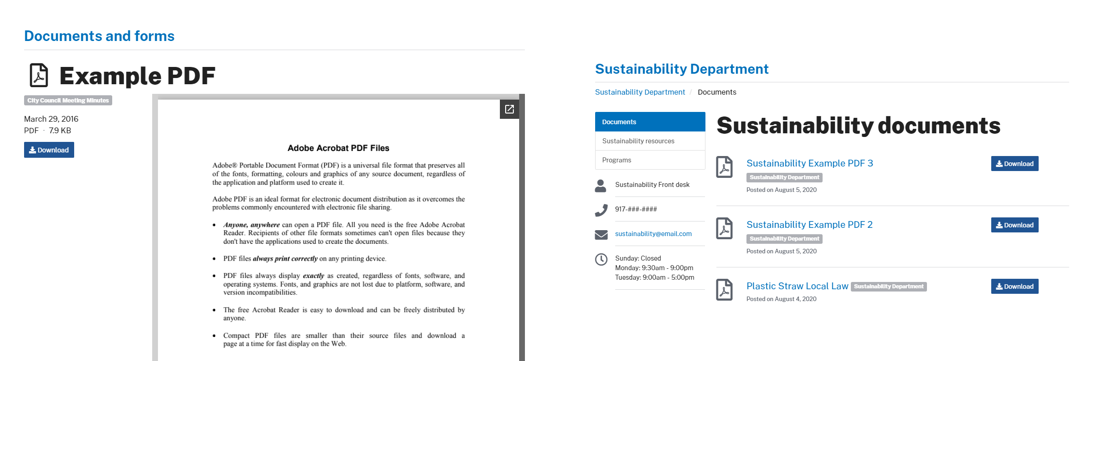
Example
In our ProudCity demo site, we created an example pdf for your viewing. After creating a document and attributing to a document type, the document(s) will be displayed on a page. Provided is an example of a page with a document listing. At the end you will be able to see a document library, where the categories are listed and serve as filters.
Steps
Create document type
Document types will show up as labels when publishing a document. To help you visualize this, please view this example pdf in our ProudCity demo site. By creating document types we are able to display category specific documents as lists. This is the first step to creating document lists throughout your site. If you have already created a document type please skip to the “Create document” or “Displays documents on web page” section of the guide.
- Go to the dashboard
- Click on the ‘‘Documents’ label on the left navigation bar
- On the left navigation bar, click on ‘Document Types’
- Add document type
- Write a name for the document type
- Leave the ‘Parent Category’ drop down with the default text of ‘None’.
- Click ‘Add New Document Type’
- This new document type will now be an option in the Parent Category drop down menu.
- If you want to add a subcategory
- Write a name for the document type
- Select the Parent Category by clicking on the ‘Parent Category’ drop down menu.
- Click ‘Add New Document Type’
- Subcategories are indented
- Click ‘Add New Document Type’

Create document
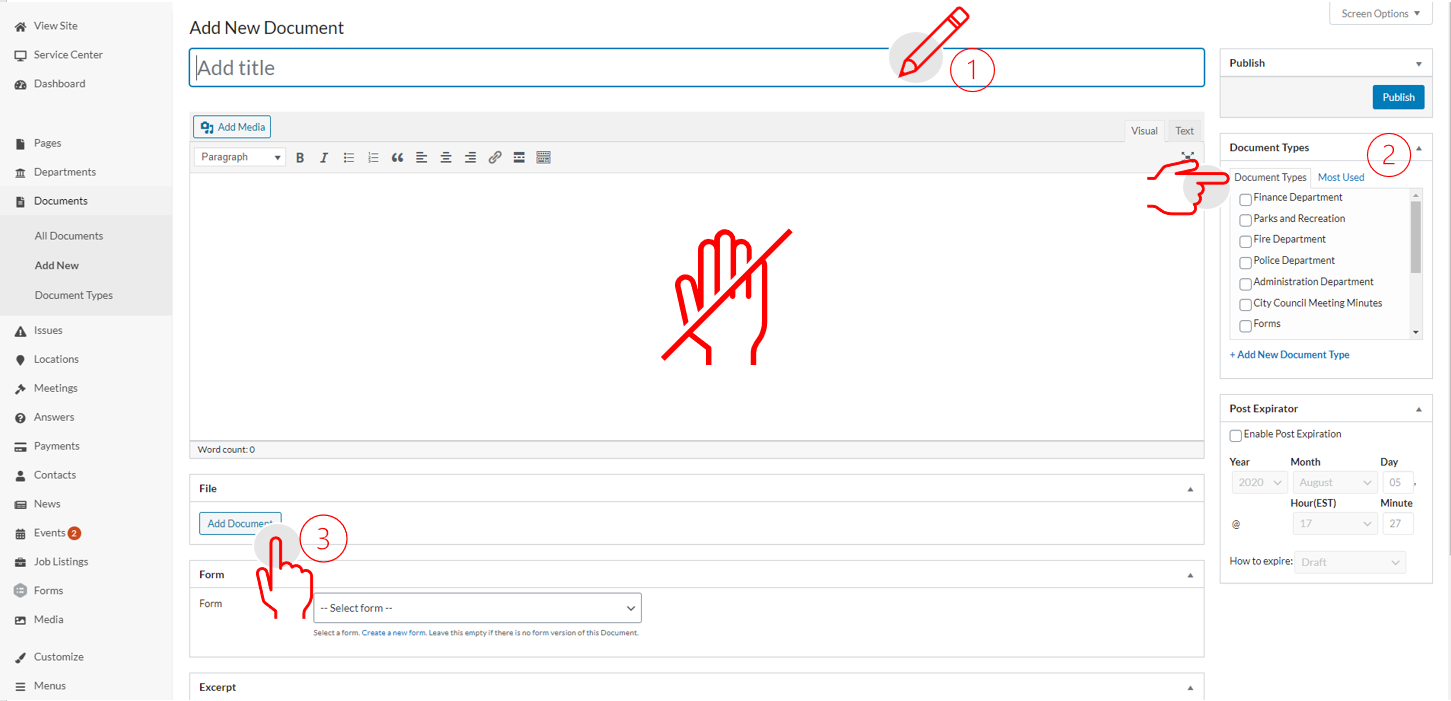
A document will have a title, category label, download button and embedded file. A document will have a unique url path therefore writing a clear and accurate title to help site search is important.
- Go to the dashboard
- Click on the ‘Documents’ icon or the ‘Documents’ label on the left navigation bar
- Click ‘Add new’
- Add document title
- Select category/type, on the right side, under the ‘Document Types’ section.
- The document can belong to many categories
- Skip text area
- Click ‘Add Document’ on the ‘File’ section, located below the visual editor.
- Click ‘Upload Files’ or ‘Media Library’
- If you select to upload files, click ‘Select Files’ and upload the document
- If you select the media library, select the document in your media and click insert.
- Click ‘Publish’
- Click “View Document” on the top admin bar or the permalink to view department. Note: To go back into the document admin functionality click on ‘Edit Document’ on the top admin bar.
- You created a document!
- Repeat these steps for each ‘Document’ that you would like to have included in your list.
Displays documents on a web page
Use the document list widget to display documents as a list on a web page. The document list widget allows to list documents by document type.
- Navigate to an existing page or create a new page
- Note: You should know you are on a page when the admin bar on top states ‘Edit page’
- Click ‘Edit page’
- Enable page builder by clicking on the ‘Pagebuilder’ tab , if there is no option to click on the tab, the pagebuilder layout is enabled.
- Note: In order to use the document list widget, pagebuilder has to be enabled

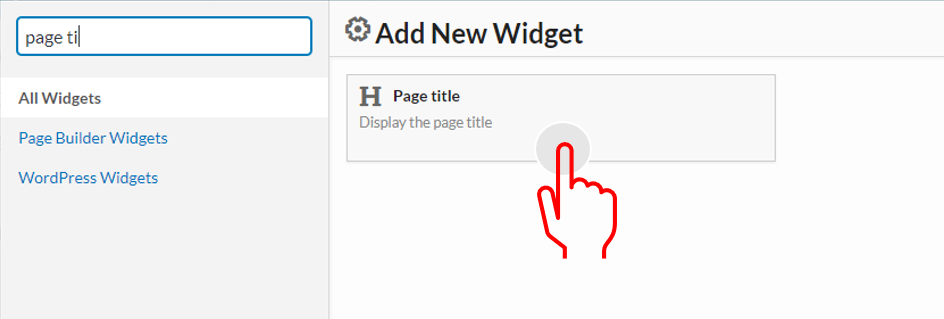
- Click on the ‘Add widget’ icon tab
- Add page title by selecting the ‘Page title’ widget
- Note: You can scroll through the widgets or type in the widget name on the search bar.
-
- Click on the ‘Add widget’ icon tab
- Add the ‘Documents list’ widget
- Hover over the document list widget and click edit
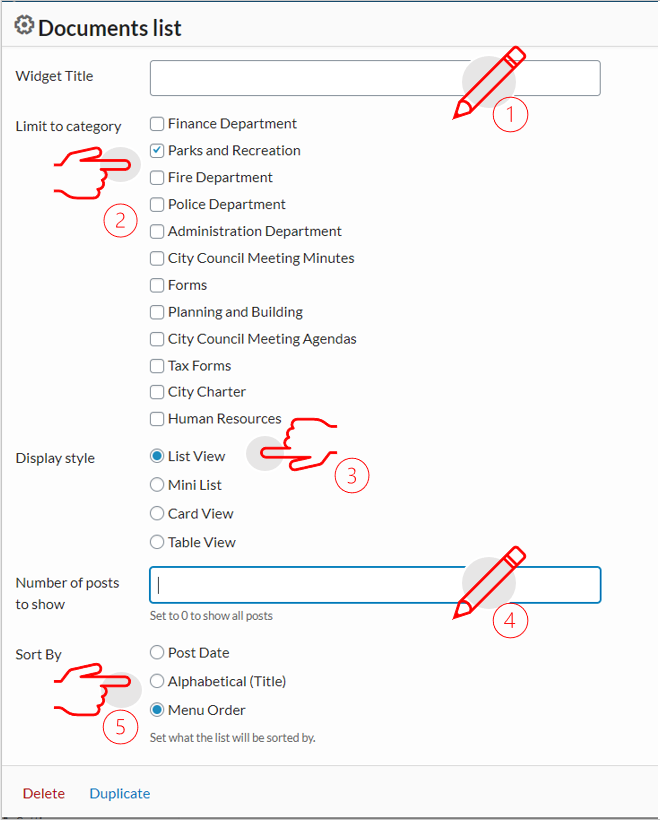
- Add widget title
- This can be ‘Documents’ if it is a department document page, since the page title widget will display the title as [Department] documents. For example, The Administration department will have the page title ‘Administration documents’ therefore naming the list ‘Administration documents’ is redundant.
- Pick the category(ies) to display
- If the parent category is selected, it will also display all its corresponding sub categories
- Select display style
- Documents are commonly displayed in the ‘List View’ style but you can always go back and change the style that best matches your ProudCity site.
- Insert a number of post to show in the ‘Number of post to show’ field
- Enter 0 for all documents to show under the selected category type or select specific amount to list.
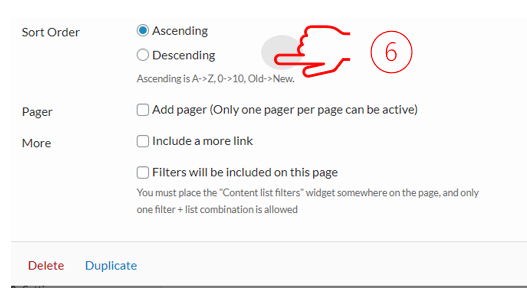
- Pick ‘Sort By’
- Select sort order, either ‘Ascending’ or ‘Descending’
- Click done
- Add widget title
- Click ‘Update’
- Click ‘View Page’ on the top admin bar or the permalink to view page
- Note: To go back into the page admin functionality click on ‘Edit Page’ on the top admin bar.
- Finished, your documents will now be listed on the page!


Do’s and don’ts
Do
- Try to keep files to under 20MB for site performance
- Write a clear and accurate title to help site search
- Make sure your Document is being published to a document list somewhere on your site
- Enable pagebuilder layout to add document list widget
- Write a clear document type name since it will display as a label for the document
Don’t
- Have unstructured pdf documents as it will not comply with ADA regulations.
- Use PDF files that are photocopied, these files are unnecessarily large and unstructured
Resources
- Why and how to compress PDFs
- PDFs and digital government
- How-to create a page in your ProudCity-powered government website
- A quick guide to government website content structure
- A quick guide to government website images
- How to upload images or media
- Is there a maximum file size
- Which document format should I use?
- How do you list documents?
ProudCity is a digital government platform that makes it easy and cost-effective to launch and manage all aspects of digital government operations, including websites, meetings, online forms and payments.
Subscribe to our newsletter or connect with us on Twitter, LinkedIn and elsewhere.