An introduction to the page builder editor

Posted on August 26, 2020


page widget featured image

Overview

ProudCity Pagebuilder is an advanced editor that allows you to design and structure your content by adding widgets and elements to a page. We also have a layouts option that has pre-built pages. The pre-built layouts are organized based on the page destination or purpose and can be customized with the page widgets to suit your specific needs.

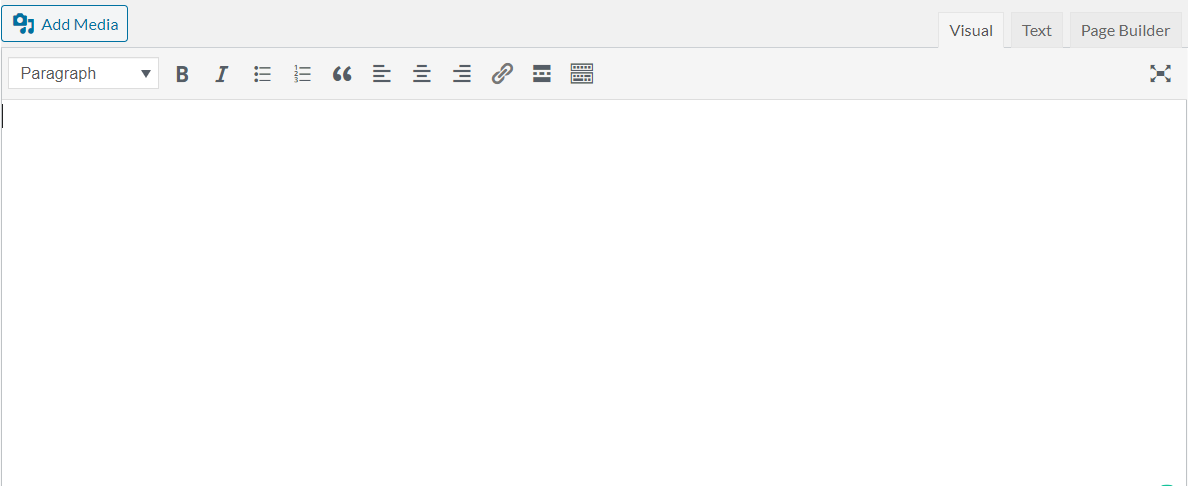
Visual editor vs page builder

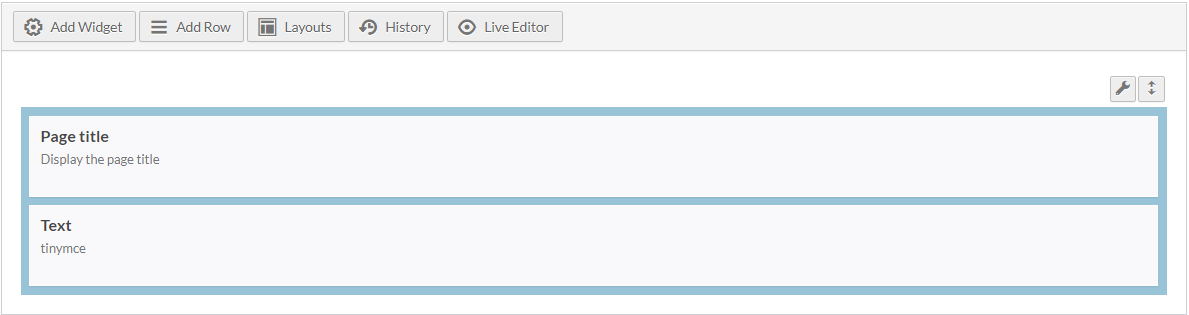
The visual editor has text and embedded media which is the extent of the page element customization.  The most common way of identifying if the page is built with the page builder editor is if there are recognizable uses of widgets, such as icon sets, image sets, document list, and so on.

Visual editor –

Visual editor view

Page builder editor

page builder editor

Example

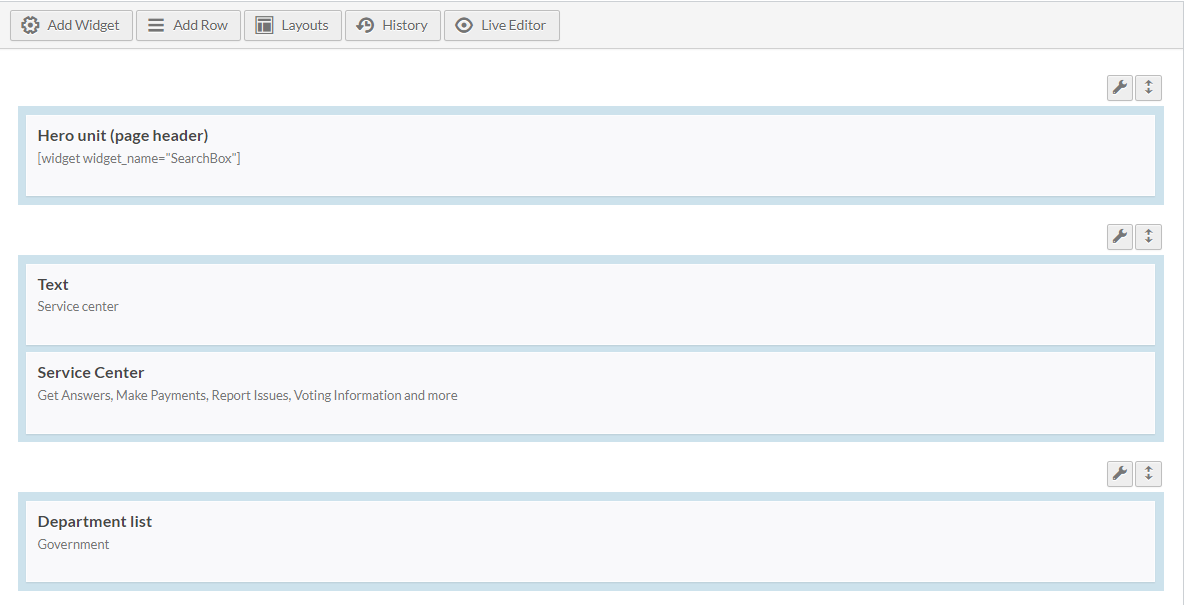
In our ProudCity demo site, our home page is built using the Page builder editor. To view a full list please read the Pre-built page layouts article, it teaches you how to use the function of the layout while listing all the pages that use the page builder editor.

Steps

  1. Go to the dashboard
  2. Click on ‘Pages’ on the left navigation bar or the ‘Pages’ icon
  3. Click ‘Add New’
  4. Add page title
  5. To enable the page builder editor click on the ‘Page Builder’ tab.
  6. If you do not have the option to click on the ‘Page Builder’ tab, the editor has been enabled.
  7. Get to know the interface

page builder menu

Add Widget
  • Widgets are blocks of content that can have specific styles and functionalities.
Add Row
  • Rows add structure to your page.
Layout
  • Pre-built page layouts can easily be inserted into a new or existing web page. The page widgets in each layout can then be customized to suit your specific design and content needs.
History
  • Lets you restore the previous version of the page.


Construct the structure of your page

The add row bottom constructs the layout of the row, it can be split into a number of columns. This allows you to reserve blocks of spaces on the page to then customize with widgets based on your designed structure.

  1. Click on the ‘Add Row’ button the page builder editor bar
  2. Insert the number of columns in the first field
  3. Select from the drop-down menu, the ratio of your columns
    • Notice how your columns alter in size with the different ratio options to help you visualize the exact size of each column.
  4. Pick the direction in which the ratio split should be applied from the drop-down menu with the default text ‘Left to Right’.

Use widgets

In order to use the widgets, they all require you to enable the page builder editor.

  1. Click the ‘Add Widgets’ tab on the top editor bar
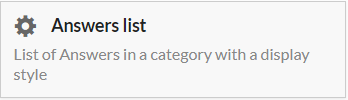
  2. Select from the list of widgets.
  3. Once selected, hover over the widget and click ‘Edit’.
  4. Below is a table of the widgets and the steps to take.
    •  Please note that some widgets serve to display content that was created in a different admin functionality. For example, events, news, documents, and contacts require creating categories and items for the categories, which will then appear on the page when using a list widget. The steps covered are here to help you understand what to fill out when selecting the widget to make it visible on the page. Feel free to check the articles listed to understand the full cycle of creating documents, events, news, and contacts.


answers list widget
  1. Add widget title
  2. Select the answer categories to display on the page
  3. Select display style
  4. Select sort By
  5. Select sort order
  6. Click ‘Done’
  7. This widget is used
  8. For a detailed guide, read the ‘How to create and list answers’.
audio widget
  1. Add audio title
  2. Click ‘Add Audio’
  3. Select from the media library
  4. Click ‘Done’
 breadcrumb widget
  1. Prints out page header information above with breadcrumb. Important! if placed as the first item in a page with this checked, the normal page header region and sidebar menu will be hidden.
  2. Checkmark ‘Yes’
  3. Click ‘Done’
calendar widget
  1. Add widget title
  2. Checkmark which event categories to display
  3. Click ‘Done’
code iframe widget
  1. Add widget title
  2. Add Code – usually the code is wrapped in <iframe> </iframe> tags.
  3. Click ‘Done’
contact submenu widget
  1. Add widget title
  2. Select the ‘Stacked’ or ‘Pills’ format
  3. Select the contact categories to show
  4. Insert the page that lists the contacts information for Agencies
  5. Insert the page that lists contacts, including a filter for categories
contacts list widget
  1. Add widget title
  2. Checkmark the contact category to display
  3. Select the display style
  4. Insert a number of posts to show in the ‘Number of post to show’ field. Enter 0 for all staff members to show under the selected category type or select a specific amount to list.
  5. Select sort by
  6. Click ‘Done’
  7. For a more detailed guide, please read the article, ‘How to create contacts’.
contact list widget
  1. This widget is used in conjunction with the ‘Content list filters’ widget
  2. Add a title to the content list widget
  3. Select the content type from the drop-down menu
  4. Select ‘Display style’
  5. Insert the number of posts to display, if all should display, insert 0
  6. Click ‘Done’
  7. Now add the ‘Content list filter widget.
content list filter widget
  1. The content list filter is used in conjunction with the ‘Content list’ widget.
  2. Before adding the widget, make a row with 2 columns, with a ratio of thirds and going from right to left.
  3. Place the content list filter on the left column and the ‘Content list’ widget on the right column.
custom contact block widget
  1. Add widget title
  2. Type in the contact name in the ‘Contact Name’  field
  3. Insert the ‘Contact email or form’
  4. Insert the ‘Contact phone’
  5. Insert ‘Contact FAX’
  6. Insert the ‘Contact hours’
  7. Add social media links in the ‘Social Media Networks’ section

department contact widget

department hours widget

department menu widget

department social media widget

department list widget
  1. Add a title to the department list widget
  2. Select ‘Display style’
  3. Insert a number of posts to show in the ‘Number of post to show’ field. Enter 0 for all departments to show.
  4. Select sort by option
  5. Select the sort order
  6. Click ‘Done’
document list widget
  1. Add document widget title
  2. Pick the category(ies) to display
  3. Select display style
  4. Insert a number of posts to show in the ‘Number of post to show’ field. Enter 0 for all documents to show under the selected category type or select a specific amount to list.
  5. Select sort order, either ‘Ascending’ or ‘Descending’
  6. Click done
  7. To add a document and the document category follow the steps in the ‘How to create documents’ article.
embed document widget
  1. Add document name on the widget title field.
  2. Add document URL to the ‘Document ID’ field.
event list widget
  1. Add widget title
  2. Select the event categories to display
  3. Select the display style
  4. Insert a number of posts to show in the ‘Number of post to show’ field. Enter 0 for all events to show under the selected category type or select a specific amount to list.
  5. Click ‘Done’
  6. To learn how to create an event and more details as to how to use the event list widget, please read the article ‘How to create events’.
facebook embed widget
  1. Add a title to the Facebook page embed widget
  2. Add Facebook Page URL
  3. Checkmark the tabs to display
  4. Insert height, start with the default of 2000 and then resize to your liking.
form widget
  1. Select form from the drown down menu.
  2. Checkmark if the form should display as a drop-down
  3. This widget is only to display a form not create one.
gallery widget
  1. Add a title to the gallery widget
  2. Click ‘Add Images;
  3. Click on the ‘Uploads files’ tab or the ‘Media Library’ and add images.
  4. Select the images for you gallery
  5. Click on ‘Create a new gallery’
  6. Add captions 
  7. Click ‘Insert into Gallery’
  8. Click ‘Done’
hero widget
icon link widget
  1. Add link title
  2. Add link URL
  3. Add icon
  4. Click ‘Done’
icon set widget
  1. Add widget title
  2. On the Icons 1 tab, add Link title
  3. Link Url
  4. Select Icon
  5. Select Add Another
  6. Repeat steps 2-5 until you have finished your set
  7. Click ‘Done’
image widget
  1. Click on the ‘Choose Media’ or ‘Image Search’ and insert image
  2. Select image size
  3. Select image alignment
  4. Select title alignment
  5. Add alt text
  6. If the image needs to be linked to a page, add a destination URL
  7. Check/Uncheck, ‘Open in a new window’, ‘Bound’, ‘Full Width’
  8. Click ‘Done’
image set widget
  1. Add the title for the image set in the ‘Widget Title’ field
  2. Select display type
  3. Select the column across option (How many columns to display)
  4. On the image item 1 tab, insert link title
  5. Insert URL for the link
  6. Click ‘Select image’
  7. Click ‘Add Another’, and repeat steps 4 -6, until you have inserted your set
  8. Click ‘Done’
job list widget
  1. Add a title to the job list widget
  2. Checkmark the job categories that should display
  3. Select the display style
  4. Insert a number of posts to show in the ‘Number of post to show’ field. Enter 0 for all jobs to show under the selected category type or select a specific amount to list.
  5. Click ‘Done’
meeting list widget
  1. Add a title to the meeting list widget
  2. Checkmark the meetings categories to display
  3. Select the display style
  4. Insert a number of posts to show in the ‘Number of post to show’ field. Enter 0 for all meetings to show under the selected category type or select a specific amount to list.
  5. Click ‘Done’
new post list widget
  1. Add a title to news post list widget
  2. Checkmark the news post categories to display
  3. Insert a number of posts to show in the ‘Number of post to show’ field. Enter 0 for all news posts to show under the selected category type or select a specific amount to list.
  4. Select sort by option
  5. Select sort order option
  6. Click ‘Done’
page title widget
  1. Drag the widget to the first row of the page builder layout. 
    • This widget does not have any editing options because it pools the information from the page title field above the permalink.
service map widget
  1. Select either ‘Google’ or ‘WordPress’
  2. Select zoom level from the default zoom level dropdown 
  3. Checkmark the ‘Render map with fullscreen options?’ ( Checking this box will allow users to click on the map to enter full-screen mode.)
Rss widget
  1. Enter the RSS feed URL
  2. Give the feed a title (optional)
  3. Select from the drop-down the number of items to display
  4. Checkmark the option to, display item content, item author if available or item date.
service center widget
  1. Checkmark the tabs that should display on the Service center application
  2. Checkmark the ‘Answers’ content that should display
  3. Click ‘Done’
sub menu widget
  1. Add a title to the submenu widget
  2. Select the ‘Menu to use’ by clicking on the drop-down option
  3. Select format
  4. Click ‘Done’
text widget
  1. This visual editor is your standard WYSIWYG editor and the simplest editor for just adding content to a page.
twitter page embed
  1. Add a title to the twitter widget 
  2. Add handle – @username. For example,  @getproudcity.
  3. Insert height, start with 2000 and then adjust to your liking.
  4. Click ‘Done’
video widget
  1. Add a title to the video widget
  2. Click ‘Add Video’
  3. Click on ‘Insert from URL’ tab and insert the video URL.
  4. Click ‘Add to widget’

Pre-built layouts

We have an article on how to use Pre-built layouts. Provided is a list of the pages that can be created using the pre-layouts.

Do’s and don’ts

Do

  • Add page title widget.
  • Label each widget with a  title to structure your content.
  • Use the ‘text’ widget if you want to add text content with your familiar visual editor tools

Don’t

  • Forget to save the page after you’ve customized a widget detail.
  • Add department widgets to a page.
  • Forget to configure your widget details if you use prebuilt layouts.
  • Add Department hours, Department menu, Department social media to a page, these belong to the ‘Department’ template.

Resources

Close window